Ever year my Uncle John would stop at my Grandma's when we were dying eggs. Before the dying began he would take an egg, and with a white crayon, he would draw question marks and write "the mystery egg" and the year on it. He would then hide it back in the bunch of undyed eggs. Who ever dipped their egg in dye and discovered they got the mystery egg got a prize. One year a pez dispenser, one year a back scratcher. Just something little.
My Uncle John passed away suddenly this February, however this is a tradition that will not die with him.
Saturday, April 23, 2011
Monday, April 11, 2011
Ugly Bugly Eggs
To make these little critters you will need:
Blown eggs
Pipe cleaners
Paper for wings
White glue
Acrylic paint
I drilled two holes for my buglies. One in the bottom for emptying the egg and one in the top to insert the antennae.
Taking a clean, dry, blown egg, paint it to resemble the bug of your choosing. There are many colorful insects to choose from, or use your imagination and create your own critter.
For the lady bug and blue beetle, I painted the underside brown with black lines to denote segmentations in the thorax and made the heads black. I painted the top halves the appropriate colors for my bugs and added spots and stripes. I recommend working one side at a time and letting it dry completely in between.
Once your have your bug painted to your liking take your pipe cleaner (I used black but you can use any color you like) snip it down so that, when folded in half, you will have antennae for your bug in a length you are happy with. Once you have the pipe cleaner cut down, fold it in half and twist the bottom as tightly as you can. Add a bit of white glue to the twisted end and gently work it in to the top hole on your egg. Once the glue is dry you can curl the pipe cleaner and position it as your like.
If you do not have pipe cleaners, you can use strips of construction paper for antenna as well.
To display your buglies, you can set them in tiny flower pots, egg cups, or a basket. You can also tie thread around the antennae and hang them up.
Happy decorating!

Thumb Print Eggs
This is a quick and all ages friendly way to decorate eggs.
You will need:
Eggs
Ink Pads of varying colors (or washable markers)
Markers
Your fingers
Using your finger prints create designs on your eggs. Try multiple thumb prints to create a flower, or combine a thumb and finger tip print to make a chick. Using markers, add in details like eyes, beaks, feet, or just outline your creation.
The possibilities are only limited by your imagination.
Happy decorating!

Sunday, April 10, 2011
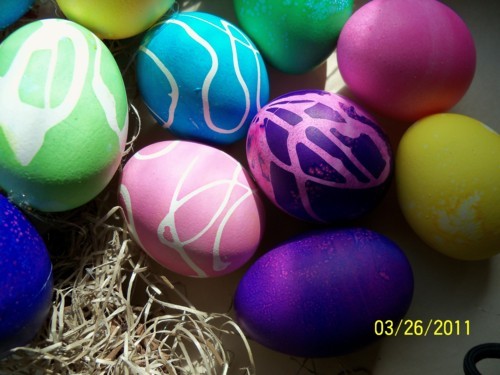
Tie Dye Eggs
Every year when my siblings and I would gather at the kitchen table to color eggs under the supervision of our mother, our dad would contribute to the batch with one or two "tie dye" eggs.
For this simple technique you will need:
Take your spoon or dropper and begin adding drips of dye on to the egg through the towel or cloth.

Once you have covered one side, unwrap the egg, turn it over and repeat the process. Remove the egg and let it dry. When finished, your eggs will look something like this...
Happy decorating!
For this simple technique you will need:
- Paper towels or a wash cloth you do not mind ruining.
- Egg dye
- Spoon or medicine dropper
Take your spoon or dropper and begin adding drips of dye on to the egg through the towel or cloth.
Once you have covered one side, unwrap the egg, turn it over and repeat the process. Remove the egg and let it dry. When finished, your eggs will look something like this...
Happy decorating!
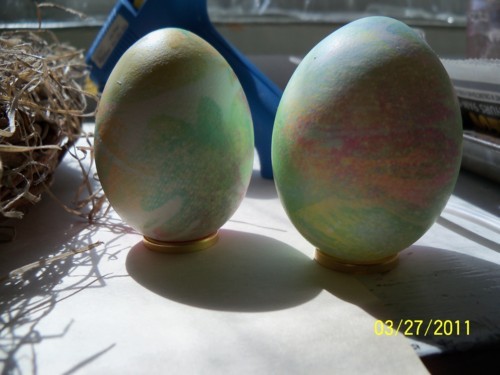
How to make swirly eggs
For this technique you will need:
Egg Dye
Egg dipper or large spoon
Rubber cement
For white swirls on a colored egg, take a white egg and drizzle rubber cement over it. Let the rubber cement dry. Dip the egg into the dye and let it sit until it reaches the desired shade. Remove the egg from the dye and set it on a drying rack. Once the egg has completely dried, peel away the rubber cement to reveal a white swirl pattern.
For colored swirls, dye the egg in a lighter shade such as pink. Once the egg has reached the desired shade, remove from the dye and let dry completely. Once the egg has dried, drizzle the rubber cement on it as above, letting it dry before dipping the egg into a darker shade such as purple. When you remove the rubber cement, you will now have colored swirls on your egg.
Egg dying basics
My passion for decorating easter eggs developed early in my childhood. I saw magic in dipping a boring white egg into a mug, only to remove it moments later, and have it be transformed into a vibrantly colored thing of beauty.
As I have aged, I have toyed around with varying techniques of decorating eggs, and I will share some of these methods throughout the coming weeks.
The basics:
Invest in some Wilton Food Coloring pastes. You will get such vibrant colors that cannot be rivaled by the boxed PAAS and DUDLEY sets. Plus, you can use them for all your food coloring needs.
If you want to blow your eggs out, invest in a Blas-Fix. I think it is currently my favorite gadget. There are several other egg blowers on the market which I have not had the opportunity to try. The Blas-fix however is relatively inexpensive and very easy to use. I love it. It beats the old way of actually blowing into eggs and giving myself a headache.
If you plan on dying already blown eggs you will need to weigh them down in the dye. Try setting something like an acrylic paint bottle on top of them.
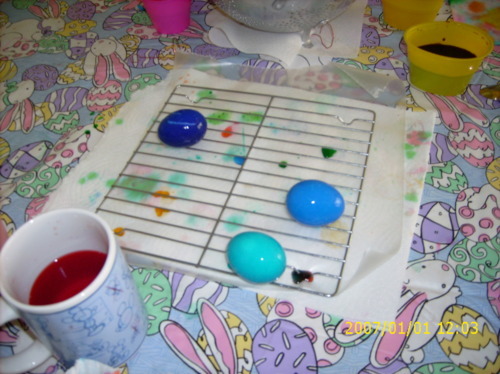
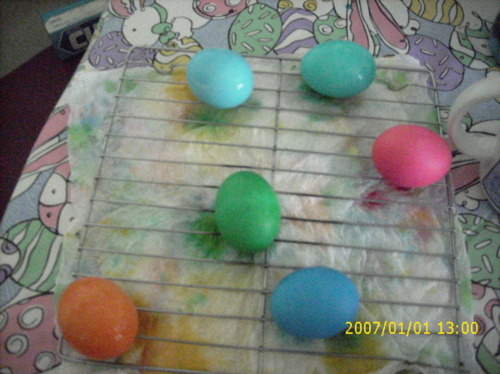
Now to do some standard egg dying, you will need the following:
Large mugs or mason jars
1/2-3/4 cup of boiling water (Playing with the amount of water will vary the shades of the egg dye)
1 tsp white vinegar
Food coloring (preferably of the gel paste variety)
Tooth picks
Large spoon or egg dippers
Optionally: a paint brush to mix the food coloring with. It breaks up any globs and ensures the color is fully dissolved.
Be sure to cover your work areas with a plastic table cloth and/or newspaper and paper towels. The food coloring pastes will stain.
Take a small amount of food coloring using your toothpick and stick it into your jar/mug. Add the vinegar and swirl the toothpick around loosening the gel as much as possible. Gradually add in the hot water and stir ensuring the food coloring is fully dissolved. Let the dyes cool and begin coloring your eggs!
NOTE: Do NOT add vinegar to PINK and RED food coloring. It breaks it up into chunks and will leave your eggs splotchy. I have found, for pink especially, it is best to omit the vinegar for these.
This basic egg dye formula will lead to all sorts of wonderful coloring experiences.
As I have aged, I have toyed around with varying techniques of decorating eggs, and I will share some of these methods throughout the coming weeks.
The basics:
Invest in some Wilton Food Coloring pastes. You will get such vibrant colors that cannot be rivaled by the boxed PAAS and DUDLEY sets. Plus, you can use them for all your food coloring needs.
If you want to blow your eggs out, invest in a Blas-Fix. I think it is currently my favorite gadget. There are several other egg blowers on the market which I have not had the opportunity to try. The Blas-fix however is relatively inexpensive and very easy to use. I love it. It beats the old way of actually blowing into eggs and giving myself a headache.
If you plan on dying already blown eggs you will need to weigh them down in the dye. Try setting something like an acrylic paint bottle on top of them.
Now to do some standard egg dying, you will need the following:
Large mugs or mason jars
1/2-3/4 cup of boiling water (Playing with the amount of water will vary the shades of the egg dye)
1 tsp white vinegar
Food coloring (preferably of the gel paste variety)
Tooth picks
Large spoon or egg dippers
Optionally: a paint brush to mix the food coloring with. It breaks up any globs and ensures the color is fully dissolved.
Be sure to cover your work areas with a plastic table cloth and/or newspaper and paper towels. The food coloring pastes will stain.
Take a small amount of food coloring using your toothpick and stick it into your jar/mug. Add the vinegar and swirl the toothpick around loosening the gel as much as possible. Gradually add in the hot water and stir ensuring the food coloring is fully dissolved. Let the dyes cool and begin coloring your eggs!
NOTE: Do NOT add vinegar to PINK and RED food coloring. It breaks it up into chunks and will leave your eggs splotchy. I have found, for pink especially, it is best to omit the vinegar for these.
This basic egg dye formula will lead to all sorts of wonderful coloring experiences.
The easter egg artists
At my grade school library, there was a book I checked out so many times, I am pretty sure my name was the only name on the check out card. I think this book is part of the reason I am obsessed with making "fancy" Easter eggs. Also, I am a sucker for anthropomorphized animals. This book was The Easter Egg Artists by Adrienne Adams. I highly recommend this as a fun little holiday read for you and your little ones.
Subscribe to:
Posts (Atom)